
Exploring Visual Basic 1.0 for MS-DOS
I recently posted the CloudWisp Application Loader to this site - an MS-DOS program for organizing your games and applications.
The task of creating it was made easy thanks to the not-very-well-known Microsoft Visual Basic 1.0 for MS-DOS.
I’m going to explore some of the basics of the program, how you can use it, and some things I learned along the way.
Introduction
Microsoft released Visual Basic 1.0 for MS-DOS in 1992, at a time when many users and businesses were still using DOS. It was actually the second Visual Basic release; coming after the Windows version 1.0 in 1991.
It succeeds QuickBASIC, but unlike it’s predecessor provides an event-driven GUI rendered in text mode using ASCII characters. It has all the familiar elements: Button, Text Box, Checkbox, Combo Box, List, etc. It’s an experience that should be familiar to anyone who has used the windows versions.
Getting Started
You can download the program from winworldpc. Get the Professional edition, which provides support for ISAM database connection and manipulation.
It comes as 7 disk images. If you are using DosBox, or are able to copy large volumes to your DOS installation in one go, you can extract the floppy images into a single folder. It should install this way.
Run SETUP.EXE from Disk 1 and follow the instructions.
The Basics
You’ll want to create a directory for your new project. Navigate there and then launch VBDOS.EXE (by calling the full path of the exe, e.g. c:\vbdos\vbdos.exe) - this will ensure the working directory points to your project directory
I recommend first saving your project. It will be saved with a *.MAK extension.
Creating a Form
Create a Form, File -> New Form to start.
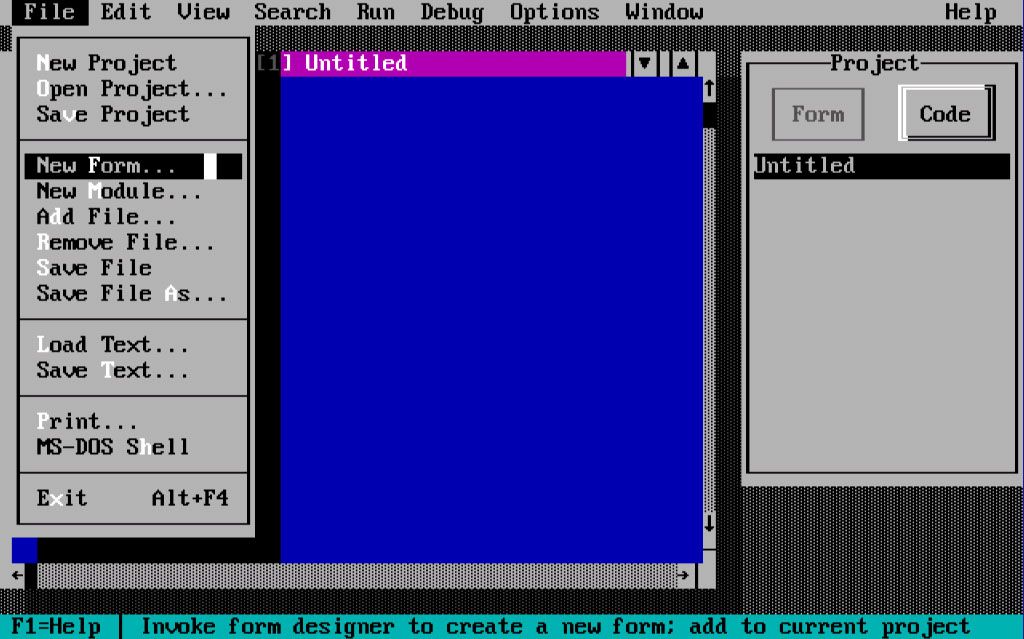
You’ll be presented with a blank form.
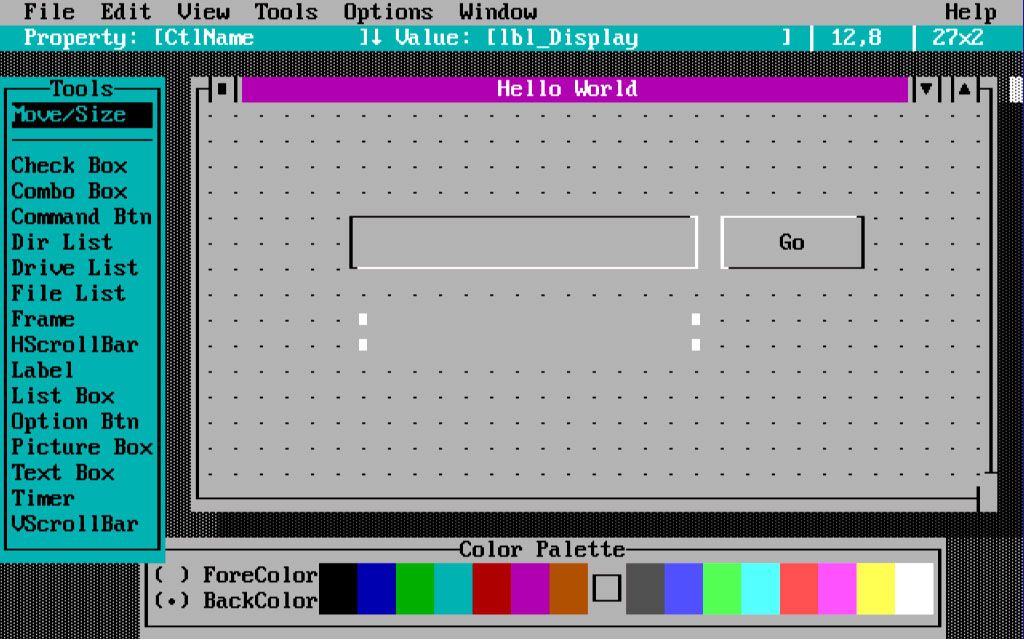
Double click any of the controls from the list on the left, and they will be added to the form. You can drag the items to place them.
Like in all windows versions, controls have properties that define their state and behavior.

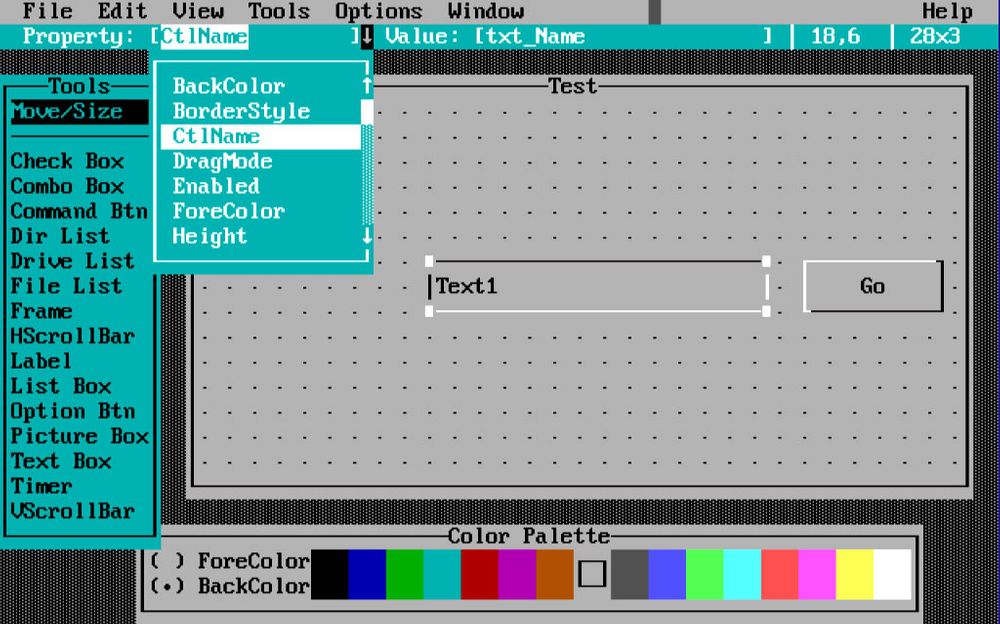
With a control active, you can edit its properties from the drop-down menu at the top, and enter the value in the text box to the right. The most important property to set, is CtlName. This is what you’ll use to reference controls later in code.
In the example above, I have created:
- A form named Test
- A Text Box named txt_Name
- A Button named cmd_Go
- A label named lbl_Display
I have also edited the Caption and Text properties respectively.
Once you’ve staged your form, given all of the controls names, set colors, etc - choose View -> Code to save and close the form editor and return to the code view.
You can return to the form view at any time using the View menu.
Event Procedure
Back in the code editor, hit F-12 to access the Event Procedures dialog. You’ll see the forms and controls that you created under Objects. Click the cmd_Go control created earlier, and select the Click event and then select Edit in Active
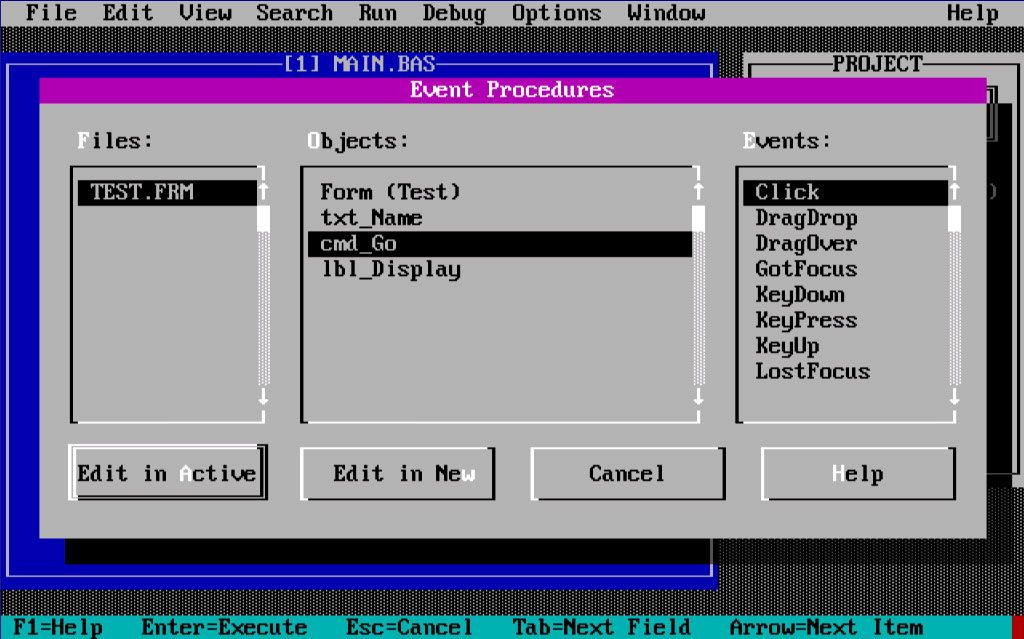
In this example, we’re simply going to take the textbox value and echo “You typed value” into the label control.
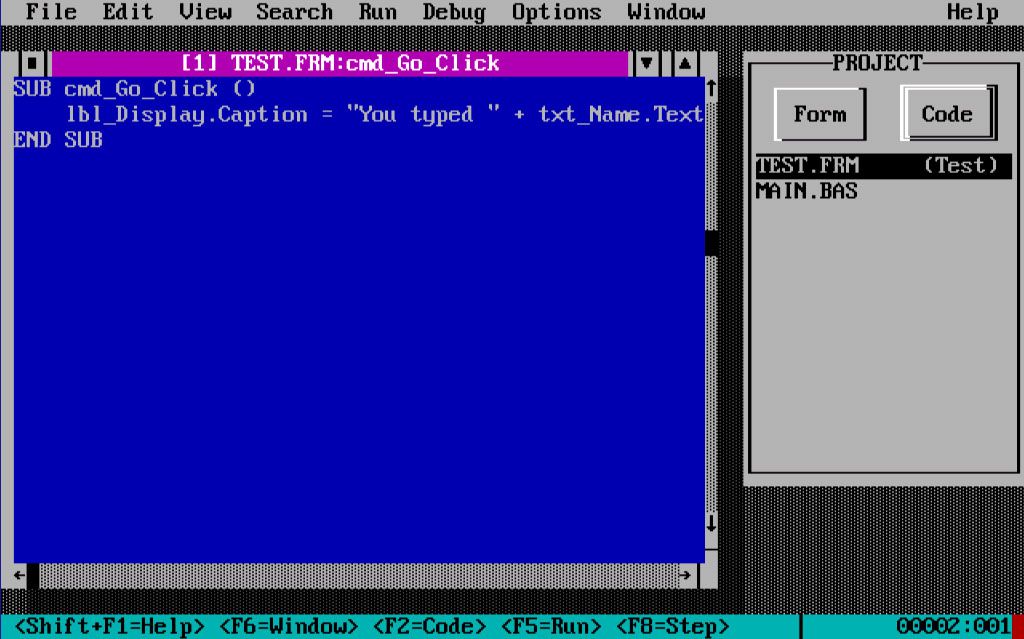
SUB cmd_Go_Click ()
lbl_Display.Caption = "You typed " + txt_Name.Text
END SUB
Other events you might commonly use:
- A Form’s Load event - Performing actions when a form first loads
- A KeyPress, KeyDown or KeyUp event on a focused element - to perform actions when a particular key is pressed
- A combo box Change event
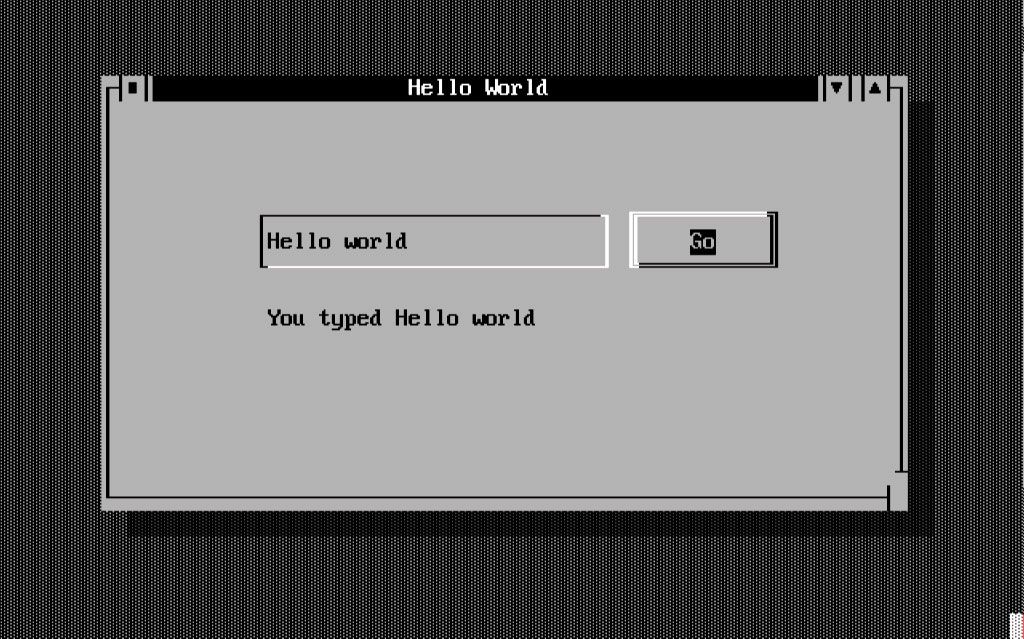
Running your Program
To run your app, you’ll need to define a startup form. Choose Run -> Set Startup File -> TEST.FRM
Now choose Run -> Start
Debugging your program
VB for DOS has a pretty good debugger - supporting break points, step-by-step execution, and inspection of variables.
It’s comparable to the early windows versions of VB.
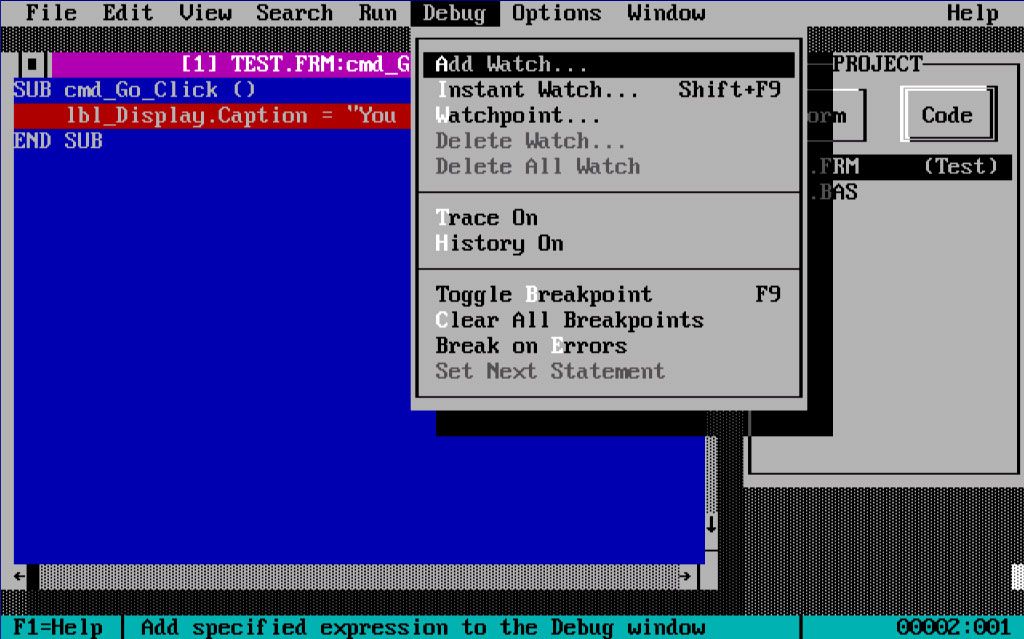
Add a breakpoint by putting your edit cursor on the line you want to stop at, and hitting F9, or selecting Toggle Breakpoint from the Debug menu.
I’d also recommend enabling the Break on Errors option.
As before, Click Run -> Start to start your program. This time however when you click the Go button, you’ll break into the code view.
Press F8 to execute the next line, and to step through the next lines.

To inspect a variable, position the cursor on the variable, and press Shift+F9 or Debug -> Instant Watch. A dialog will display showing the value.
Choose Run -> Continue to continue normal execution of the program.
Compiling your program
When you’re ready to deploy your program, you can create an EXE file.
From the Run menu choose Make EXE File.
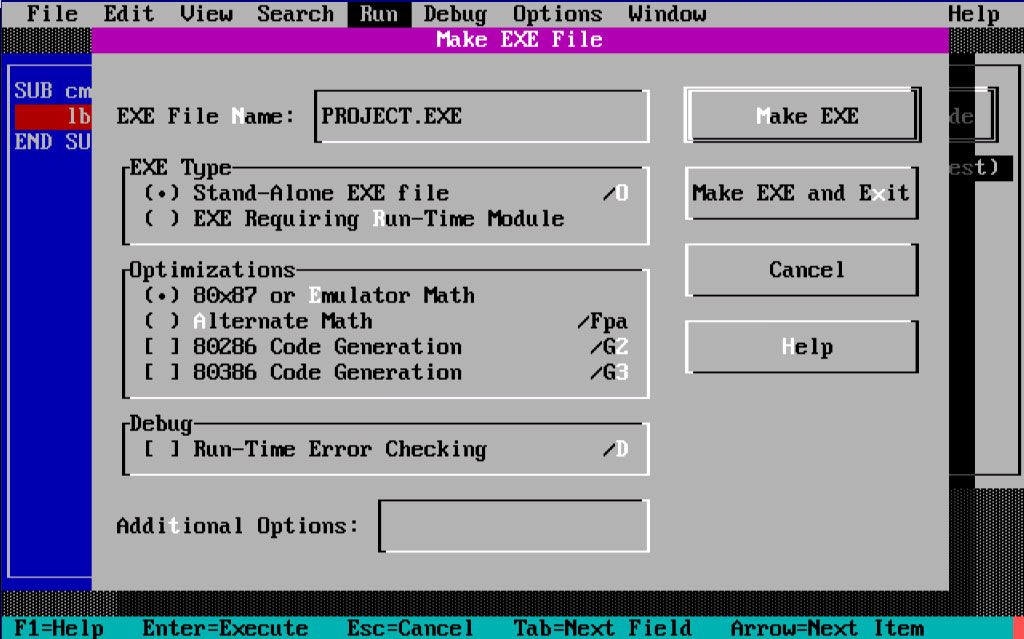
Use the default options, and select Make EXE.
The file will be saved to the current working directory.
Note: If you used the ISAM database library, and are compiling from your project directory you will be prompted to provide the proisamd.lib file. Simply type in the full path to the file to continue compilation.
Getting Help
I got stuck at several points when I was working on my app. Being created before the internet was widely used, VB for DOS has a really good help system built-in. This would have been called “On-Line” back in 1992.
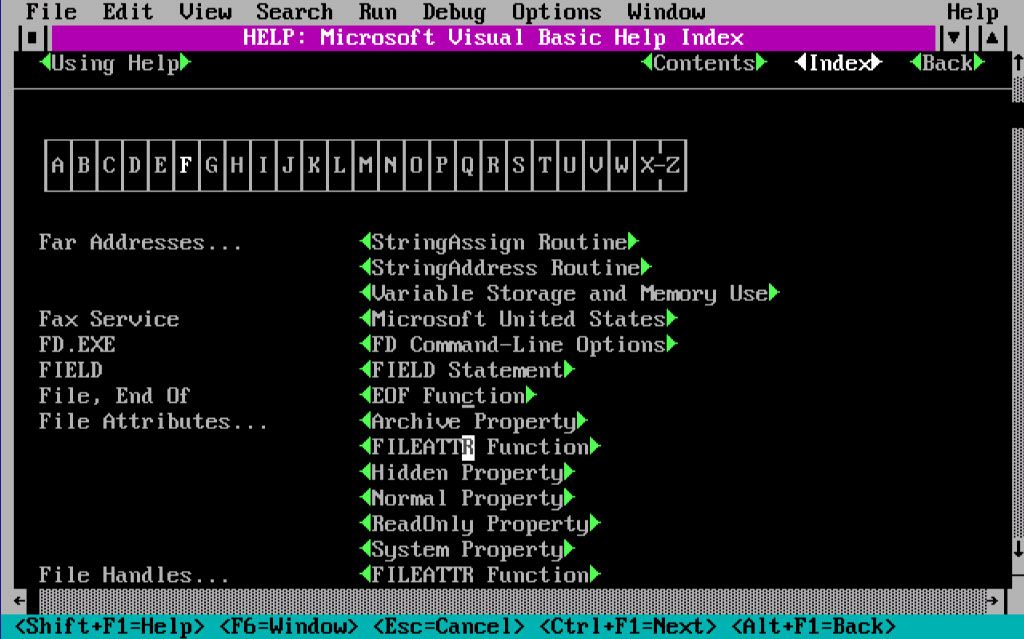
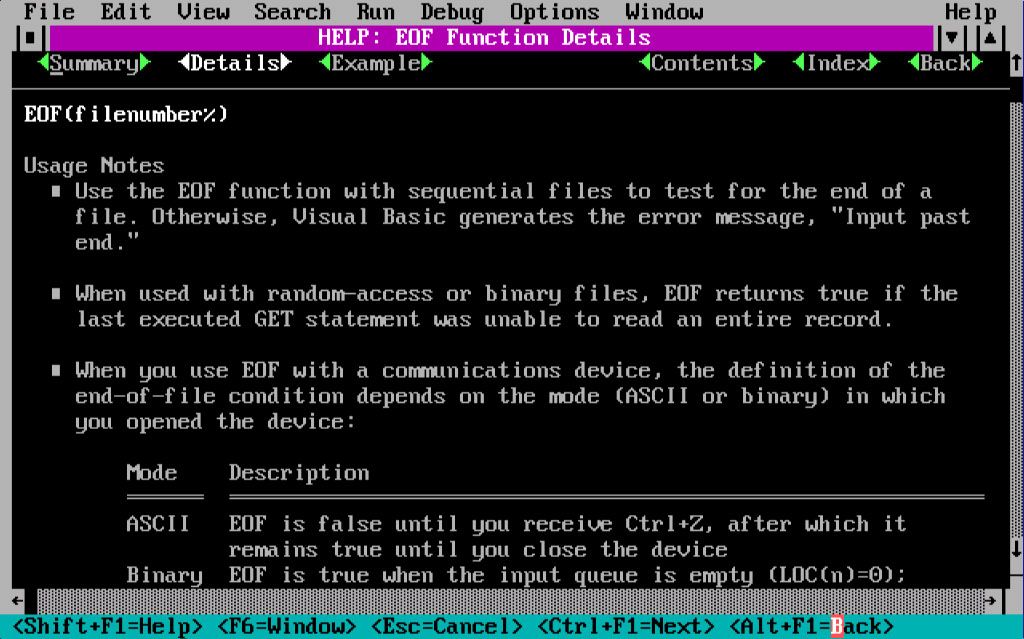
Docs have a hyper-text behavior, highlighted words can be clicked through - providing quick access to related topics.
Use the index to find topics like file input/output, database management, screen drawing, event handling, keyboard scan codes, etc.
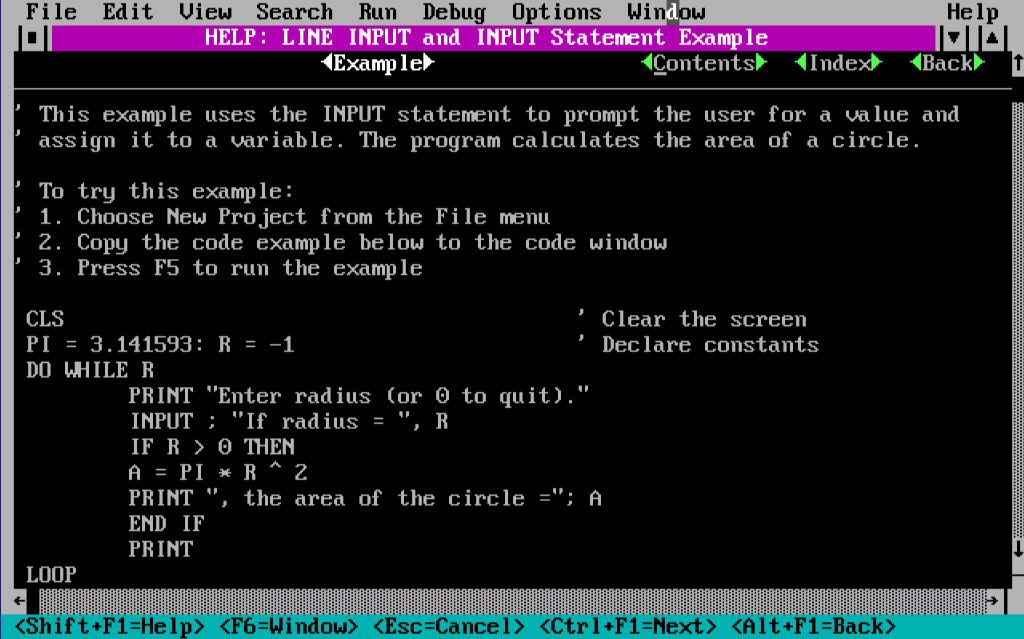
Most sections include an <example> link. These provide important context for how the methods, syntax, etc can be used.
Alas, there were some times that the on-line documentation falls short. This book was a great help.
Advanced Topics
There are some more advanced usages that I did not want to explore in this article, but are well covered by the book above, and help documentation. I recommend looking into:
- Standard/Built-In Forms - File picker dialog, help dialog, etc
- BI files (include files) - required for sharing constants and methods between forms
- Database management - using the ISAM library to store and retrieve data.
Application Loader Source Code
If you want to see some more code in action , you can download the source for the application loader:
Note: You need to run PROISAMD from the VBDOS directory before debugging/running the program from within the IDE. This installs a persistent program for DB management.